
Introduction
This guide will show you how to set up the integration between Reward Gateway (RG) and Zenith. Please note, this is a templated Outbound SSO (single-sign on) and not a SmartPay integration. If you need to enable the Zenith MyCar benefit for a Flex client, please reach out to the Flex team.
Integration setup
1. To set up the integration, go to Reward Manager > Integrations, then scroll down and click on the Zenith tile.
2. Next, click Create new Zenith.
On the Initial Setup screen, you will see that some information has already been populated.
Entry Point
3. Go to the Entry Point field, replace the part after CustomerName= with the Customer ID provided by Zenith.
This URL will be used for testing as well as for linking to the SmartHub tile or navigation bar item.
Valid Audiences
This will be pre-populated as urn:Zenith:SSO. Do not change this.
Encrypted Assertions
Zenith should send you their encryption key (certificate).
4. Check the Encrypt Assertion box and paste the certificate in the field below.
The following fields are not mandatory, but feel free to confirm with Zenith if they should be provided for any specific client.
Relay State
This is the URL on Zenith's site where the user should be redirected after being authenticated successfully.
Privacy Disclaimer
The privacy disclaimer is a page displayed to the user when transferring to Zenith for the first time, informing them what details RG will send to Zenith and allowing them to accept or decline before being transferred. Tick the Skip Privacy Disclaimer box if the client wants to skip this step.
Sign Assertion
Tick the Sign Assertion box if Zenith require the SAML response to be signed.
Metadata and Certificate
The metadata and certificate can be downloaded from the Related Links section on the right. This needs to be sent to Zenith.
Mapping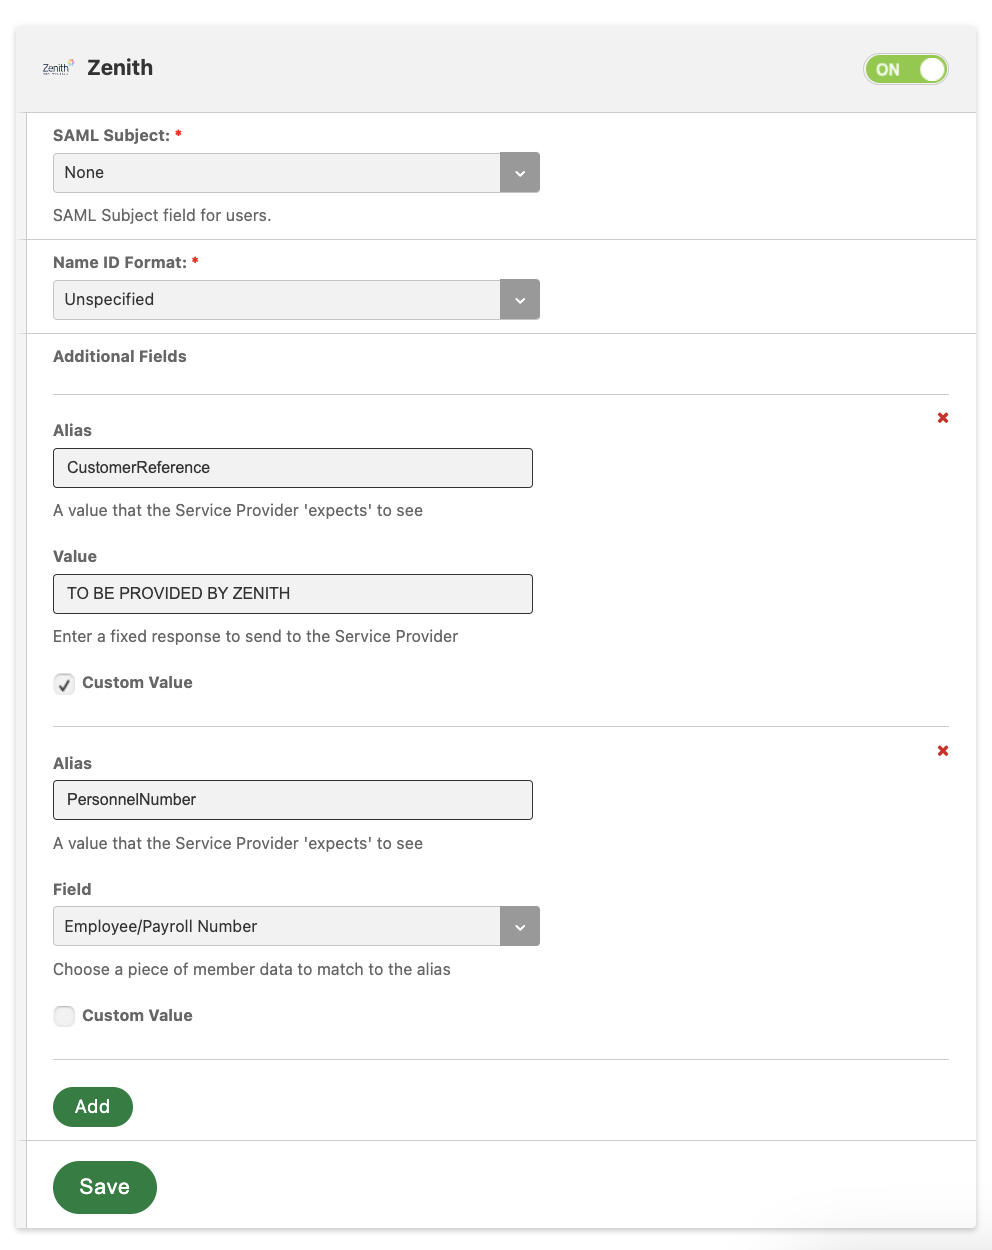
The Mapping page will have all fields required by Zenith pre-populated. This includes PersonnelNumber (Payroll Number) and CustomerReference.
The Customer Reference will be unique for each client and will be provided by Zenith. Add it in the Value field.
Testing
Once the CompanyCode has been provided, the client or RG can proceed to test the connection via the Start Test button. The test is successful if the user is redirected to the Zenith website.
Review and Publish
Once testing is complete, the integration can be published by clicking Publish on the Review & Publish screen.
Comments
0 comments
Please sign in to leave a comment.